

Why did that premium nic salt you just bought suddenly lose its vibrant punch? It's a common frustration for many vapers in the UK, especially as we move towards more sustainable, high-capacity systems. You likely agree that there's nothing worse than muddied flavours or a sticky residue blocking your airflow when you're trying to enjoy a favourite e-liquid. Since the 2025 ban on single-use vapes, learning how to clean a refillable vape pod isn't just about hygiene; it's a vital way to protect your wallet from unnecessary replacement costs.
This maintenance guide promises to teach you the essential techniques to restore your device's original flavour profile and prevent those annoying leaks. Whilst many believe a burnt taste means a dead pod, often a simple rinse of the tank or a targeted wipe of the chimney can solve the issue. You'll learn how to maximise the lifespan of your 6000+ puff hardware and ensure every draw is as fresh as the first. We'll walk you through the 'paper towel flick' safety method, deep cleaning steps for TPD-compliant 2ml pods, and the simple daily habits that keep your mouthpiece perfectly hygienic.
Key Takeaways
- Proper maintenance prevents "flavour ghosting," ensuring your premium nic salts taste exactly as intended when you switch between different blends.
- Mastering how to clean a refillable vape pod helps you remove sticky residue that blocks airflow and causes premature coil failure.
- Specific high-capacity refillable vape systems, such as those designed for prolonged use or higher puff counts, require targeted cleaning of connection pins to maintain reliable performance.
- With the 2026 Vaping Products Duty increasing e-liquid costs, effective cleaning protects your investment by preventing e-liquid waste from leaks and gunk.
- Learn to identify the definitive signs that a pod has reached the end of its lifespan, so you know exactly when cleaning is no longer enough and a replacement is necessary.
Why Regular Pod Maintenance is Essential in the Post-Disposable Era
Since the UK ban on single-use vapes in June 2025, vapers have transitioned to more sustainable, reusable hardware. This shift makes knowing how to clean a refillable vape pod a vital skill rather than a chore. Maintaining your kit ensures that every drop of e-liquid provides the crisp taste you expect. An electronic cigarette consists of an atomizer, a power source, and a container. In modern pod systems, that container is often a TPD-compliant 2ml pod that works hard to vaporise premium nic salts. Consistency is key to avoiding issues like flavour ghosting.
Flavour ghosting happens when old e-liquid residue lingers in the pod, muddling the profile of your new juice. If you switch from a sweet fruit blend to a menthol, the leftover sugars can caramelise on the coil. This leads to premature gunking and those dreaded burnt hits that ruin a pod well before its time. Regular cleaning removes this buildup, ensuring your device performs as well on its last fill as it did on its first.
The Hygiene Factor: Mouthpiece and Airflow Care
Your device spends much of its life in pockets or bags, where the mouthpiece acts as a magnet for lint, dust, and bacteria. A blocked airflow hole doesn't just make the draw tighter; it forces the coil to run hotter, which can lead to leaks. I recommend a quick daily wipe of the drip tip with a clean tissue. This simple habit prevents debris from entering the internal chamber and keeps your setup hygienic. Keeping the airflow clear is the easiest way to maintain the smooth vapour production these kits are designed for.
Economic Benefits of a Clean Device
Investing time in maintenance directly protects your wallet. With the Vaping Products Duty taking effect in October 2026, the cost of e-liquid is increasing by £2.20 per 10ml. Extending the life of your hardware is more important than ever. High-capacity kits, such as the Lost Mary BM6000 vape kit, are built to last. Learning how to clean a refillable vape pod ensures these advanced systems reach their full potential, reducing your annual spend on refill pods. It is a practical way to manage costs whilst enjoying a premium experience.
The Step-by-Step Guide to Deep Cleaning Your Refillable Pod
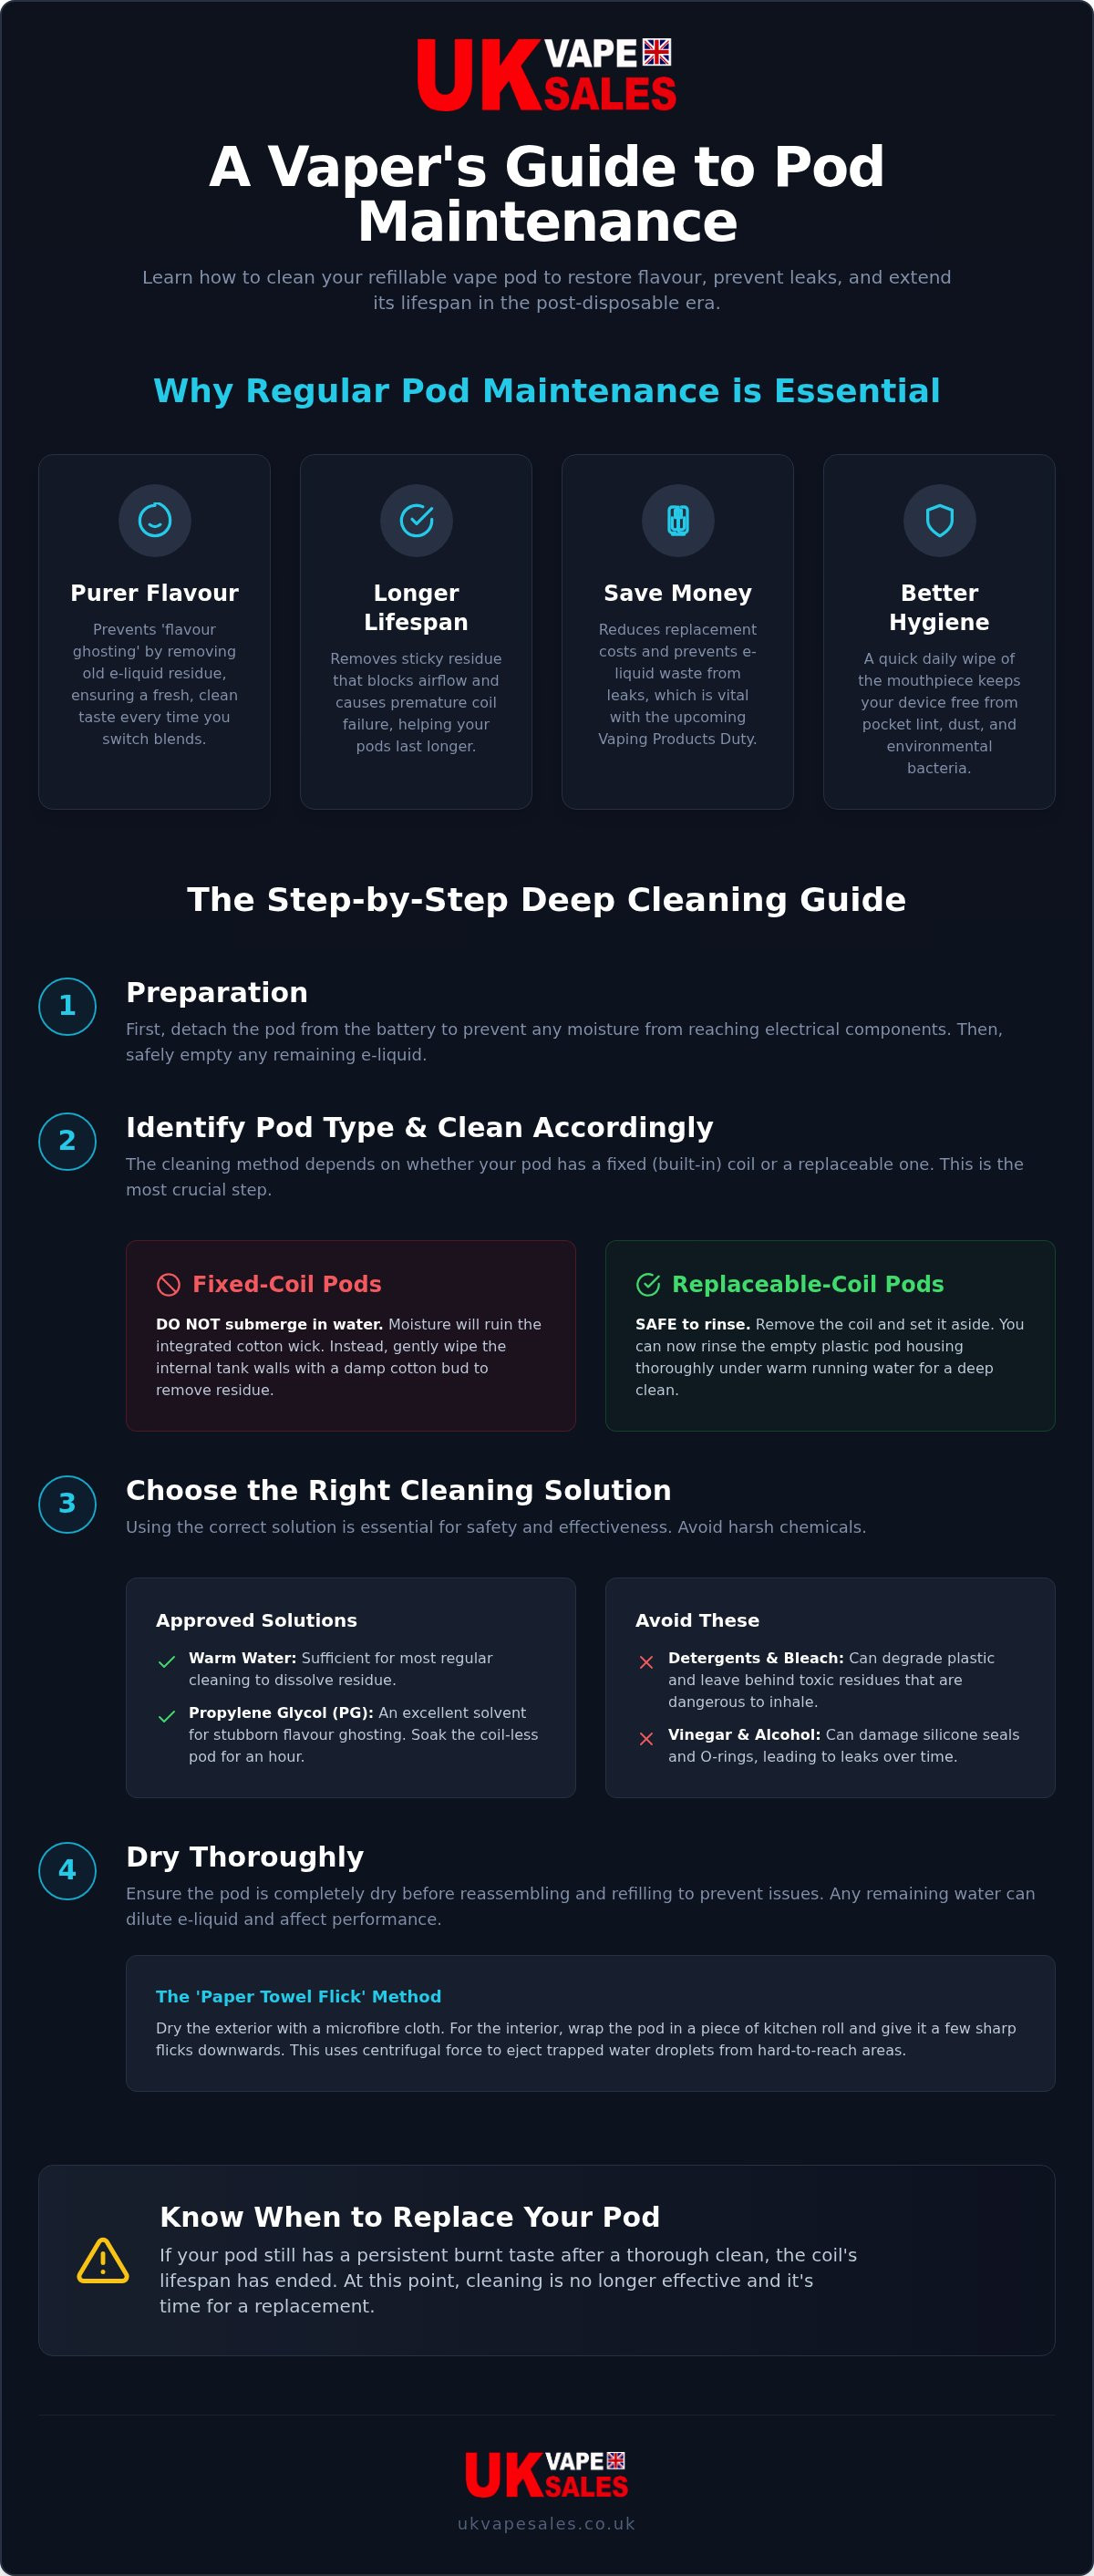
Mastering how to clean a refillable vape pod is simpler than it looks. Start by detaching the pod from the battery. This prevents moisture from reaching the sensitive electrical components of your device. Empty any remaining e-liquid into a safe waste container rather than down the sink to protect local water systems. Understanding how to clean a refillable vape pod starts with identifying your specific hardware.
Cleaning Fixed-Coil vs. Replaceable-Coil Pods
If you use a system with a built-in coil, you must be extremely careful. Never submerge a fixed-coil pod in water. Moisture ruins the cotton wicking, leading to a dead pod that won't fire properly. Instead, use a damp cotton bud to wipe the internal tank walls. For pods with replaceable coils, simply remove the coil and set it aside. You can then rinse the entire plastic housing under warm running water. This allows for a much deeper clean of the reservoir where old juice tends to hide.
Choosing Your Cleaning Solution
Warm water is usually sufficient for regular maintenance. It dissolves most residue without damaging the silicone seals. If you're struggling with flavour ghosting after using a strong menthol, a Propylene Glycol (PG) soak is a professional alternative. Submerge the empty pod, without the coil, in a small bowl of unflavoured PG for an hour. This acts as a solvent to lift stubborn aromas.
Avoid using household detergents, bleach, or vinegar. These substances can degrade the plastic and leave behind toxic residues that are dangerous to inhale. Once rinsed, use a microfibre cloth to dry the exterior. For the interior, I recommend the paper towel flick method. Wrap the pod in a piece of kitchen roll and flick it downwards to force out trapped water droplets. Ensure the pod is completely dry before reassembling. If your pod still tastes burnt after a thorough wash, it's likely time to browse our range of replacement refill pods for a fresh start.
Maintaining Modern High-Capacity UK Pod Systems
Modern high-capacity kits have changed the way we vape in the UK. These devices, like the Lost Mary BM6000 vape kit, use a clever architecture to provide more puffs whilst staying within the legal 2ml pod limit. They achieve this by using a separate 10ml e-liquid container that feeds into a smaller internal pod. Because these systems are more complex than a standard pen kit, learning how to clean a refillable vape pod with this design requires a bit more attention to detail.
One common issue with these larger systems is condensation buildup near the draw-activation sensor. If e-liquid or moisture seeps into this area, it can cause the device to auto-fire or behave erratically. I suggest checking the base of your pod and the internal sensor area every time you swap your 10ml refill bottle. Keeping this area bone-dry is the best way to ensure your hardware remains responsive and safe.
Caring for the 10ml Container and Connection Pins
The connection points between the refill bottle and the internal pod are hotspots for minor seepage. Use a dry cotton bud to gently wipe the gold-plated connection pins on the battery and the corresponding plates on the pod. This maintains a strong electrical circuit and prevents "check atomiser" errors. If you notice e-liquid on the threads of your refill bottle, wipe it away immediately. This prevents the liquid from drying and becoming a sticky residue that's difficult to remove later. If your kit feels sluggish even after a clean, it might be time to invest in fresh Lost Mary BM6000 refill pods to restore peak performance.
The 'Paper Towel Flick' and Air-Drying
The chimney is the narrow tube that runs through the centre of your pod. Over time, vapour can condense here, leading to that annoying "gurgling" sound or spit-back. To clear this without a full deep wash, use the paper towel flick. Wrap the pod in kitchen roll and flick it firmly downwards towards the floor. Centrifugal force pushes the excess liquid out of the chimney and into the paper. Always allow your components to air-dry completely before reassembling. Reinserting a damp pod can short-circuit the pins or damage the battery. For those who prefer having a backup ready whilst one set dries, browsing our collection of refill pods UK ensures you're never without a clean setup.
If you've followed these steps and still experience a muted flavour, it's a sign that the internal coil has reached the end of its life. For a reliable replacement, check out our full range of vape hardware to keep your experience as fresh as possible.
Preventing Residue Buildup and Knowing When to Replace
Even if you've mastered how to clean a refillable vape pod, the life of your hardware is often dictated by what you put inside it. E-liquids with high sweetener content are notorious for creating 'coil gunk', which is a thick, black residue that carbonises on the heating element. This buildup is notoriously difficult to remove and often leads to a permanently burnt taste. Establishing a consistent weekly maintenance routine is the best way to prevent these sugars from staining the plastic or ruining the internal wicking permanently.
How E-Liquid Choice Impacts Pod Longevity
Using premium salts like Elfliq nic salts can make a significant difference to your maintenance schedule. These liquids are specifically designed for pod efficiency, using balanced ingredients that leave less residue than cheaper alternatives. Similarly, Bar Juice 5000 nic salts perform exceptionally well in clean hardware because of their refined profiles. I recommend sticking to clear or lightly coloured liquids where possible. Dark, heavy syrups might look appealing, but they often lead to more frequent cleaning sessions and shorter pod lifespans.
Identifying When a Pod is Beyond Saving
Cleaning can solve many common issues, but it isn't a miracle cure. You'll know a pod is beyond saving if you experience a persistent burnt taste even after a deep rinse and a fresh fill. Look out for physical damage such as cracked seals or loose connection points that cause leaking. If the flavour ghosting from a previous juice remains after a PG soak, the aroma has likely permeated the plastic pod wall itself. When maintenance no longer restores that crisp draw, it's time to explore new vape hardware. Replacing a worn-out pod is always more cost-effective than wasting expensive e-liquid on a failing coil.
Whilst regular washing extends the life of your kit, every pod has a finite puff count. For most UK vapers, a refillable pod typically lasts between one and two weeks depending on the sweetness of the juice and your frequency of use. If you notice the draw becoming tighter or the vapour production dropping significantly, don't force it. A fresh pod ensures you continue to get the best possible experience from your favourite nic salts. Understanding how to clean a refillable vape pod helps you spot these signs early, ensuring you never settle for a sub-par vape.
Keep Your Vaping Experience Fresh and Cost-Effective
Maintaining your device is the most effective way to enjoy the full potential of your favourite nic salts. By mastering how to clean a refillable vape pod, you ensure every draw is hygienic and free from the muddied tastes of previous e-liquids. Regular care doesn't just improve the experience; it's a practical financial strategy to extend the life of your hardware and reduce waste. Since the 2025 disposable ban, these maintenance skills have become essential for every vaper in the UK.
Whilst cleaning can work wonders, knowing when to start fresh is just as important for a satisfying vape. If your pod shows signs of physical wear or persistent burnt notes, it's time for an upgrade. At UK Vape Sales, we provide fully TPD compliant hardware backed by expert UK-based support. Whether you need a new high-capacity kit or replacement pods, our fast domestic shipping across the UK ensures you're never waiting long for your order.
Browse our range of refillable vape kits and maintenance-friendly hardware to find your next reliable daily setup. Keep your kit clean, stay informed, and enjoy the best that modern vaping has to offer.
Frequently Asked Questions
Can I wash my vape coil with water to make it last longer?
No, you shouldn't wash a vape coil with water as it ruins the internal wicking material. The cotton inside is designed to absorb e-liquid, and water displacement often leads to a coil that won't fire or produces a thin, unpleasant vapour. Whilst some suggest rinsing can extend a coil's life, it usually results in a muted experience. If your flavour has dropped or tastes burnt, the most reliable solution is to fit a fresh replacement coil.
How often should I clean my refillable vape pod?
I recommend a quick daily wipe and a deep clean once a week to maintain peak performance. Daily habits, such as cleaning the mouthpiece and checking for condensation near the pins, prevent minor issues from becoming major faults. A thorough wash is especially important when you're switching between different nic salt profiles. Learning how to clean a refillable vape pod effectively ensures you get the most value out of your hardware whilst keeping your setup perfectly hygienic.
Why does my vape still taste like the old flavour after cleaning?
Lingering tastes occur when strong flavourings permeate the silicone seals or the plastic walls of the pod. Menthol, coffee, and aniseed are common culprits for this "flavour ghosting" effect. If a warm water rinse hasn't solved the problem, a soak in unflavoured Propylene Glycol (PG) can help lift the stubborn aromas. However, if the pod still tastes like the old juice after a deep soak, the plastic may be permanently seasoned, indicating it's time for a new pod.
Is it safe to use rubbing alcohol to clean my vape pod?
It's generally unsafe to use rubbing alcohol or harsh chemicals to clean plastic pods. These substances can cause the plastic to become brittle or even melt, leading to structural failure or the release of unpleasant fumes. Alcohol can also perish the silicone gaskets that keep your e-liquid contained. For the best results, stick to warm water or PG. If you need to sanitise the exterior, a lightly dampened antibacterial wipe is a much safer alternative.
What should I do if my vape pod is leaking from the bottom?
Start by checking that your coil is pushed in fully and the rubber fill bung is closed tight. Leaking is often caused by a break in the vacuum seal or a perished O-ring. If you find e-liquid in the battery housing, wipe the connection pins immediately with a dry tissue to avoid a short circuit. If the leaking persists after you've cleaned the pod and replaced the coil, the plastic housing probably has a hairline crack and needs replacing.
How do I clean the charging port on my vape device?
You should use a non-conductive tool, such as a wooden toothpick, to gently hook out any pocket lint or debris. Never use metal objects like needles, as these can damage the delicate pins or cause an electrical short. If the port has a sticky residue from e-liquid seepage, a quick blast of compressed air can often clear the obstruction. Keeping the charging port clean ensures a stable connection and prevents your device from overheating during a charge cycle.